gtd-web User Manual
gtd-web is a Getting Things Done (GTD) application for agents and humans. It gives you one trusted place to capture everything on your mind, clarify what each thing means, and keep moving with clear next actions — plus a guided Weekly Review to keep the whole system honest.
This manual covers every feature of the web interface, step by step, with screenshots. A final section covers API access for agents and scripts.
Contents
- GTD in 30 seconds
- Getting started: register and log in
- The main screen
- Capture: get it out of your head
- Clarify: empty your Inbox
- Next Actions: what to do now
- Projects: outcomes with more than one step
- Someday: ideas parked for later
- Waiting For: things in someone else's court
- Completed: your done list
- Weekly Review: keep the system trustworthy
- Contexts
- Account: API tokens for agents
- For agents and scripts: the REST API
- Troubleshooting
1. GTD in 30 seconds
Everything in gtd-web is an item that moves through a simple lifecycle:
| Status | Meaning |
|---|---|
| Inbox | Captured, not yet decided. Everything starts here. |
| Next action | A concrete, doable step. Your working list. |
| Project item | A next action that belongs to a multi-step outcome. |
| Waiting for | Delegated or pending on someone else. |
| Someday | Not now, maybe later. Reviewed weekly. |
| Done | Completed. |
| Trash | Not actionable, discarded. |
The workflow: Capture everything → Clarify each item into one of the buckets above → work from Next Actions → run a Weekly Review to keep it all current.
2. Getting started: register and log in
Open gtd-web in your browser (ask your administrator for your server's address). You'll see the sign-in screen.
Create an account
- Click the Register tab.
- Enter a username, an email address, and a password.
- Click Register.
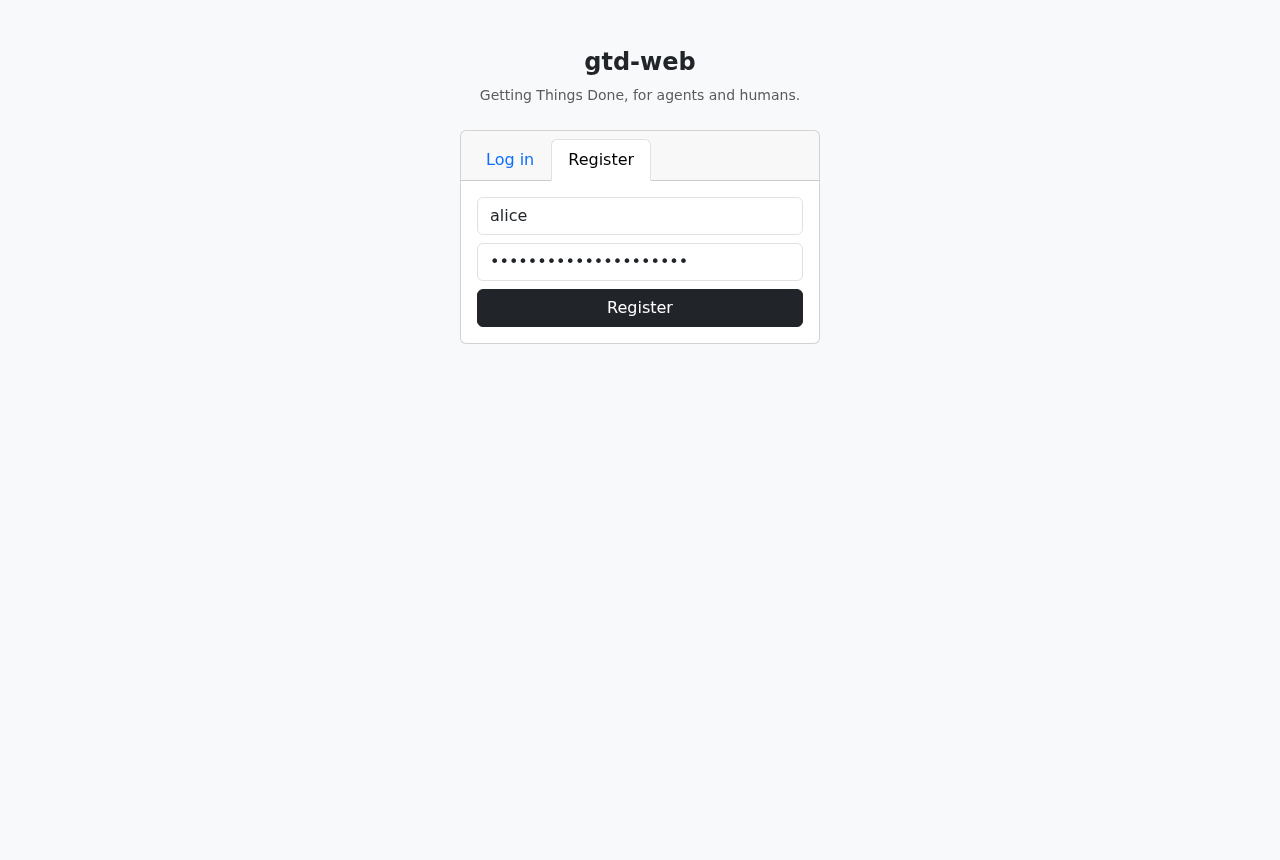
You are signed in immediately after registering. Your account's data is fully private — every user sees only their own items, projects, and contexts.
If you gave an email address, a verification link is emailed to it. You can keep using gtd-web without verifying, but you can only reset a forgotten password from a verified email address — so it's worth verifying (see Verify your email).
Note for agents/scripts: the register response includes a personal
api_key. See section 14.
Verify your email
- Open the Account tab. If your email is listed as Unverified, click Resend verification (or check your inbox for the email sent at registration).
- Open the link in the email. It confirms your address and shows "Email verified."
- You can now reset your password if you ever forget it.
Reset a forgotten password
- On the sign-in screen, click Forgot password?.
- Enter the email address you registered with and click Send reset link.
- Open the link in the email within 30 minutes and choose a new password.
For your security, resetting your password signs you out of every other device and browser you were logged in on.
If you never verified your email address, the reset link won't be sent — verify it first (see Verify your email).
Log in
- Enter your username and password on the Log in tab.
- Click Log in.
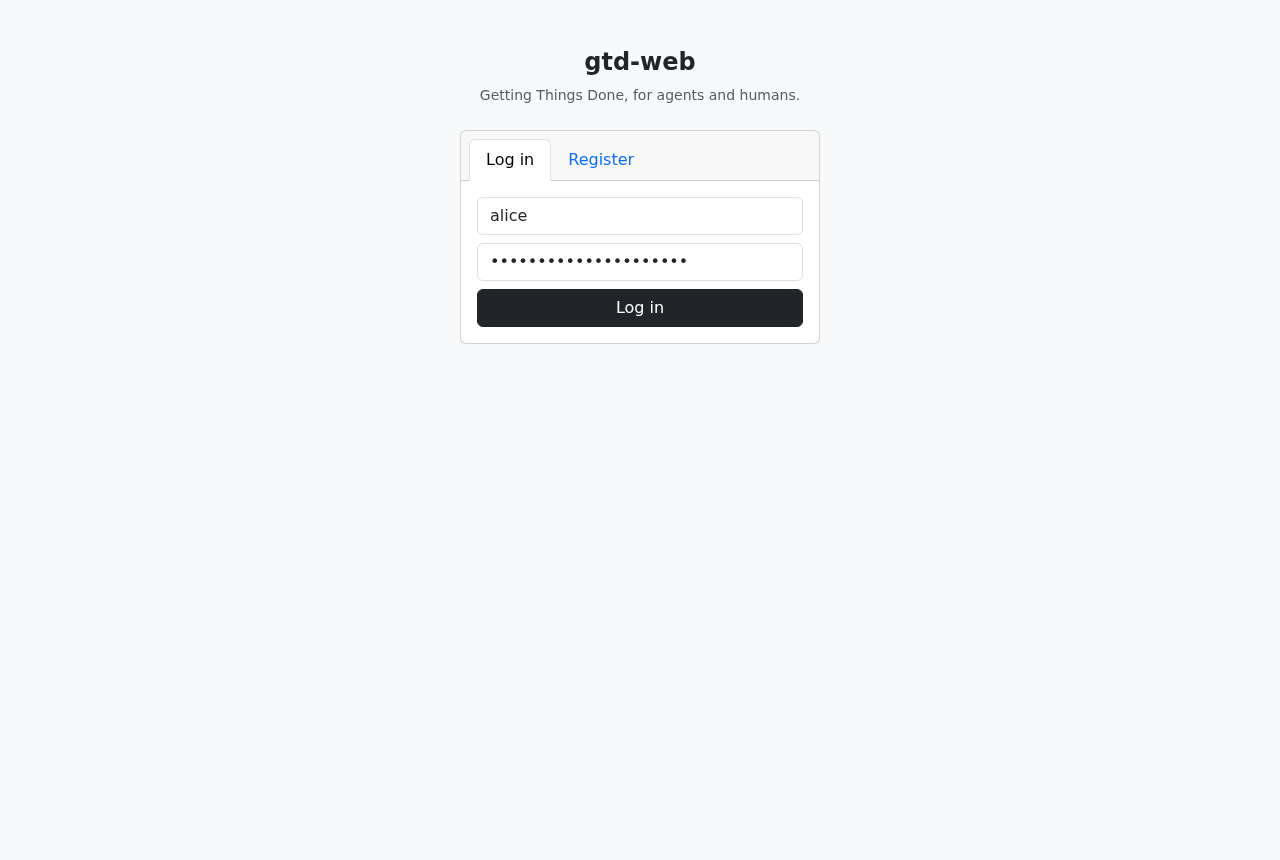
If you try too many wrong passwords in a short window, login is rate-limited for a while (HTTP 429) — wait a minute and try again.
Log out
Click Log out in the top-right corner of the header at any time.
3. The main screen
After signing in you land on the main screen:
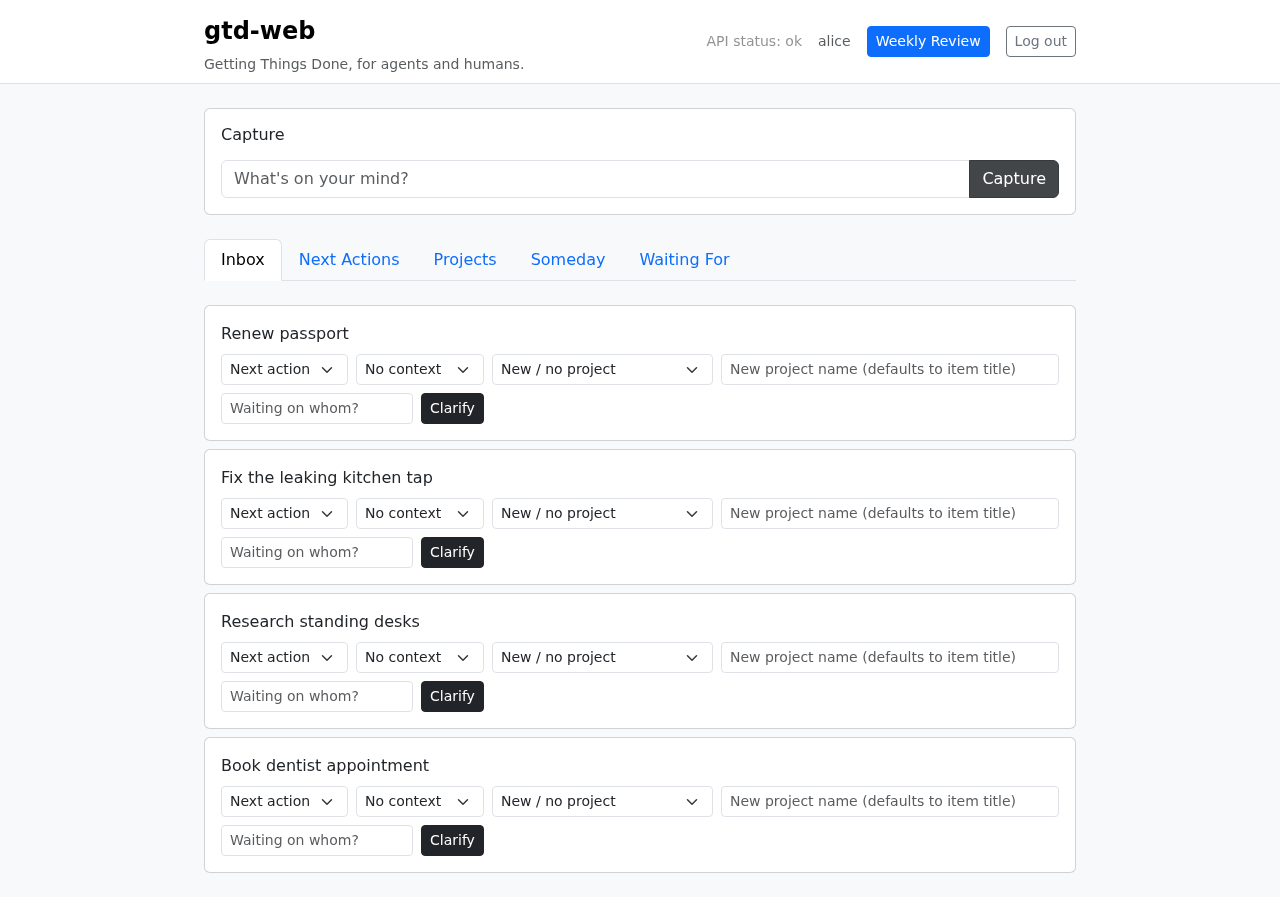
From top to bottom:
- Header — shows your username, the Weekly Review button, a Help link (opens this manual in a new tab), and Log out. If the API is unreachable or unhealthy, an "API status" note also appears here; it's hidden the rest of the time.
- Capture box — always visible, so you can capture from anywhere in the app.
- Tabs — the GTD lists (Inbox, Next Actions, Projects, Someday, Waiting For, Contexts — see Contexts — plus Completed and Account). Click a tab to switch lists. Each tab shows a badge with how many items are currently in that list (active projects for Projects), refreshed on load and after every capture, clarify, or completion. On narrow screens (and on some desktop widths), not all tabs fit in one row — the strip scrolls horizontally instead of wrapping; a soft fade appears on whichever edge has more tabs off-screen, so scroll or swipe toward the fade to reach them.
If any action or list fails to load — a network hiccup, a duplicate name, a server error — a dismissible red banner appears at the top of the screen with the reason. Click the × to dismiss it; it clears automatically the next time you retry the action.
Brand-new account: until you've captured, clarified, or added anything, every list's empty state teaches you what to do next (e.g. the Inbox tells you to use the Capture box, Someday tells you which clarify decision parks an item there) instead of the usual "all clear" copy. The Help link above and the "New here? Read the user manual" link on the login screen both point here too.
4. Capture: get it out of your head
Anything on your mind — a task, an idea, a commitment — goes into the capture box first. Don't decide what it means yet; just get it in.
- Click into the box labeled "What's on your mind?" at the top of the screen.
- Type a short description, e.g. Book dentist appointment.
- Click Capture (or press Enter).
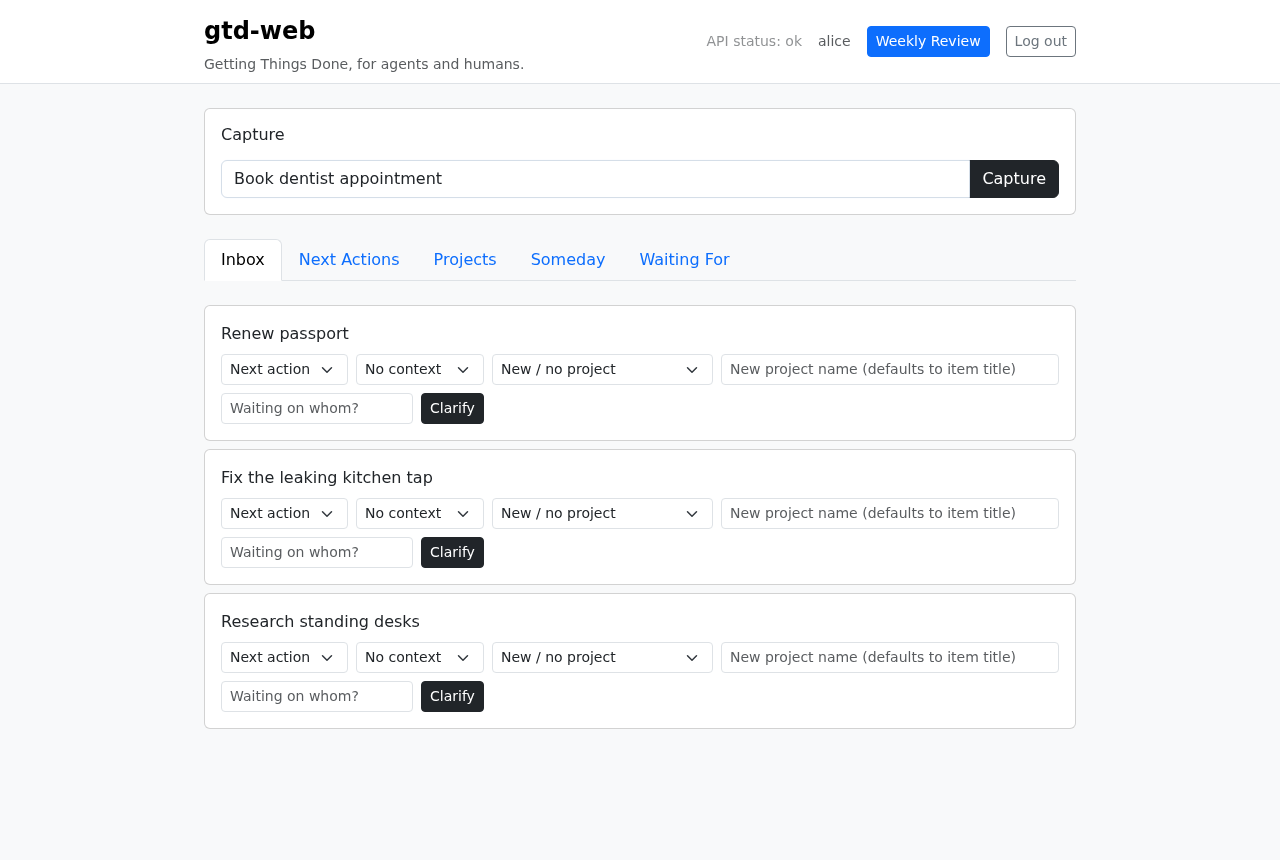
The item lands in your Inbox, ready to be clarified. Capture is deliberately frictionless — you can capture ten things in a row and clarify them later. A brief confirmation toast ("Captured '…' to your Inbox.") appears in the bottom-right corner and fades on its own, so you always know the capture went through without breaking your flow.
5. Clarify: empty your Inbox
The Inbox tab lists every unclarified item. Each card has the same set of controls:
For each item, ask "What is this? Is it actionable?" and pick a decision from the first dropdown:
| Decision | When to use it | Extra fields |
|---|---|---|
| Next action | It's a concrete step you can do. | Optionally pick a context and/or a project. |
| Project | It needs more than one step. | Pick an existing project, or type a new project name (defaults to the item's title). |
| Waiting for | Someone else has to act. | Fill in "Waiting on whom?" so you remember who owes you. |
| Someday | Not now, maybe later. | — |
| Trash | Not actionable, not needed. | — |
Then click Clarify. The item moves to the matching list and disappears from the Inbox. Choosing Trash asks you to confirm first, since the item then leaves every list for good.
Editing an item
Made a typo, or want to add notes? Click Edit on any card (Inbox, Next Actions, Someday, or
Waiting For) to turn the title into a text field and reveal a notes box, then Save. This uses
the same PATCH /api/items/{id} the API exposes — nothing about an item is locked in once it's
been captured.
Step by step: clarify an item as a next action
- Open the Inbox tab.
- On the item's card, leave the decision dropdown on Next action.
- (Optional) Choose a context such as
@computerfrom the context dropdown. - (Optional) Choose a project to attach it to.
- Click Clarify.
Step by step: turn an item into a new project
- On the item's card, select Project in the decision dropdown.
- Leave the project dropdown on New / no project.
- (Optional) Type a name in "New project name" — if you leave it empty, the item's title becomes the project name.
- Click Clarify. The project is created and appears under the Projects tab.
Step by step: record something you're waiting on
- Select Waiting for in the decision dropdown.
- Type who owes you in "Waiting on whom?", e.g. Sam (designer).
- Click Clarify. The item appears under Waiting For.
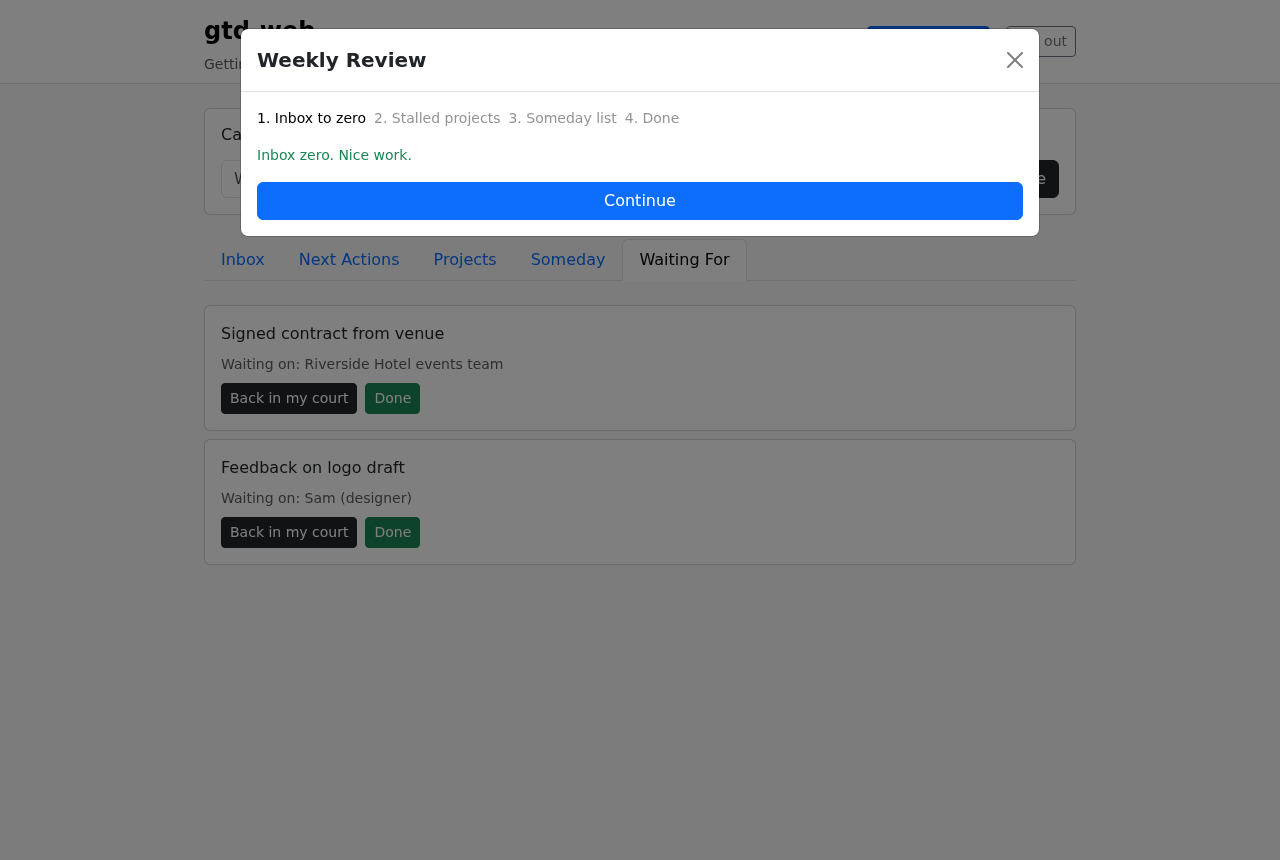
Aim for inbox zero: when everything is clarified, the Inbox shows "Inbox zero. Nothing to clarify."
6. Next Actions: what to do now
The Next Actions tab is your working list — every concrete step you've committed to, across all projects.
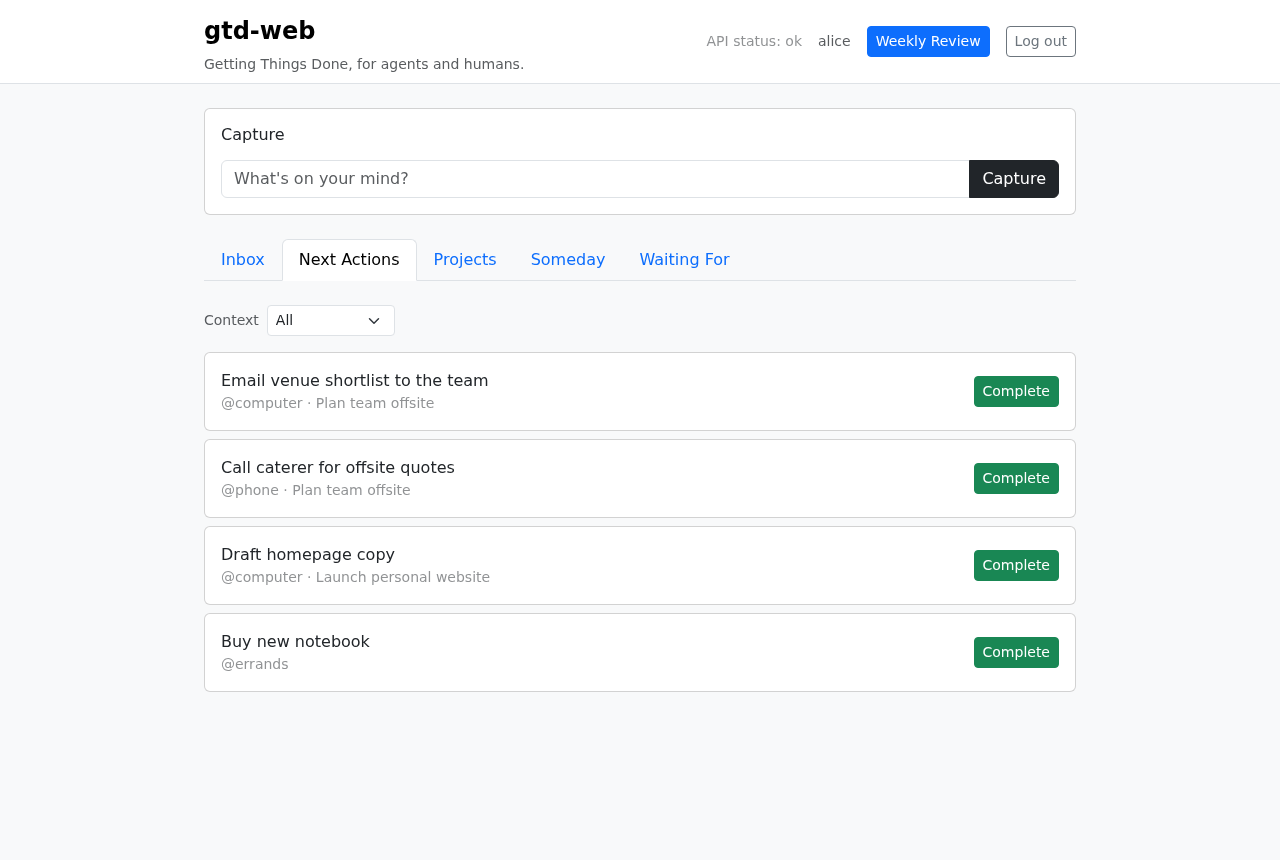
Each card shows the action's title, and underneath it the context and project it belongs to (e.g. @computer · Plan team offsite).
Filter by context or project
Use the Context dropdown to see only the actions you can do where you are right now — e.g. only @computer actions while at your desk, or only @errands while out. Use the Project dropdown alongside it to narrow to a single project's next actions. The two filters combine (e.g. @calls actions within one project):
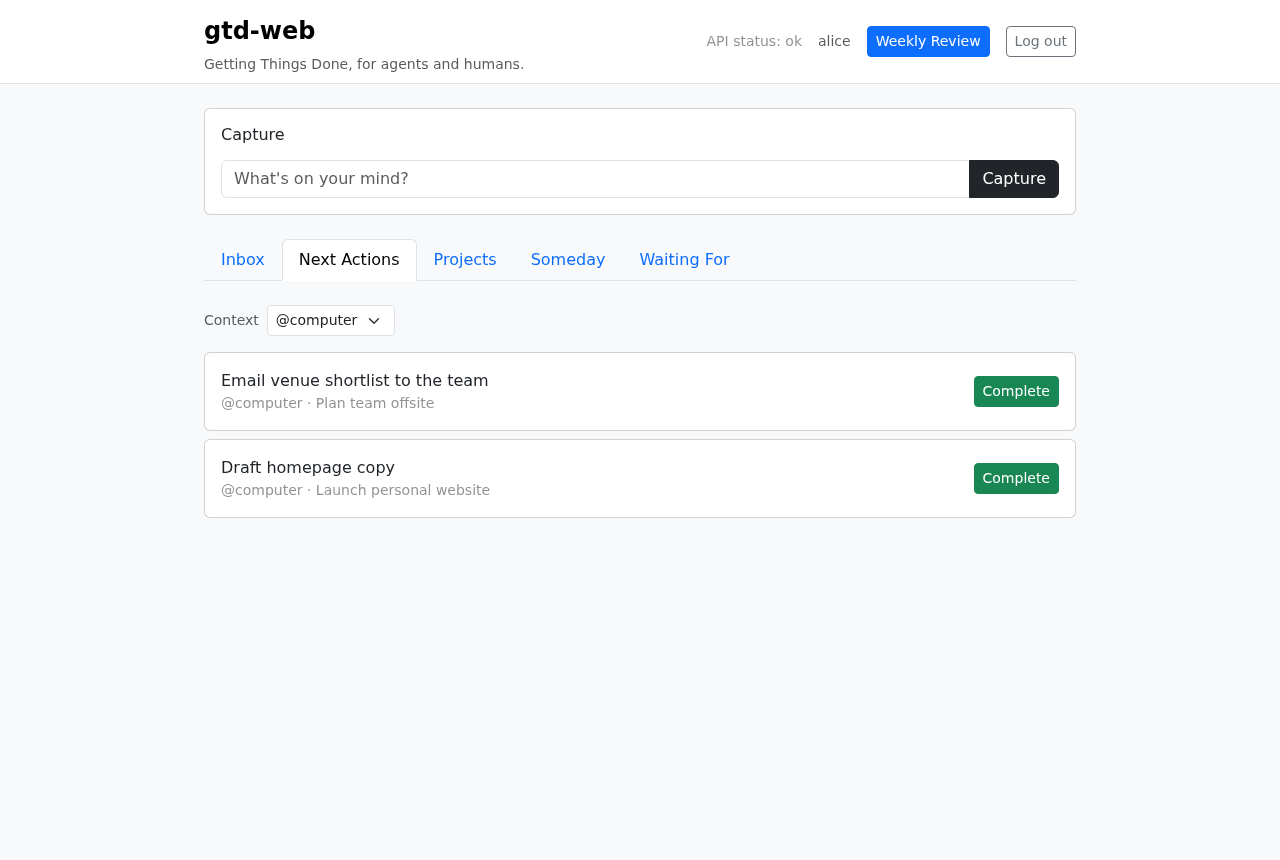
Select All on either dropdown to remove that filter.
Search
The search box in the header (Search items…) filters whichever list you're viewing — Inbox, Next Actions, Projects, Someday, or Waiting For — by a case-insensitive match against title/notes (or project name, on the Projects tab). It combines with the Context/Project filters above. Clear the box to see the full list again.
Complete an action
Click the green Complete button on a card. The item is marked done and leaves the list. A toast in the bottom-right corner confirms it and offers Undo for a few seconds if you clicked the wrong card. Missed the toast, or need to reopen something completed a while ago? See Completed: your done list.
7. Projects: outcomes with more than one step
In GTD, a project is any outcome that takes more than one action. The Projects tab lists your active projects with their items.
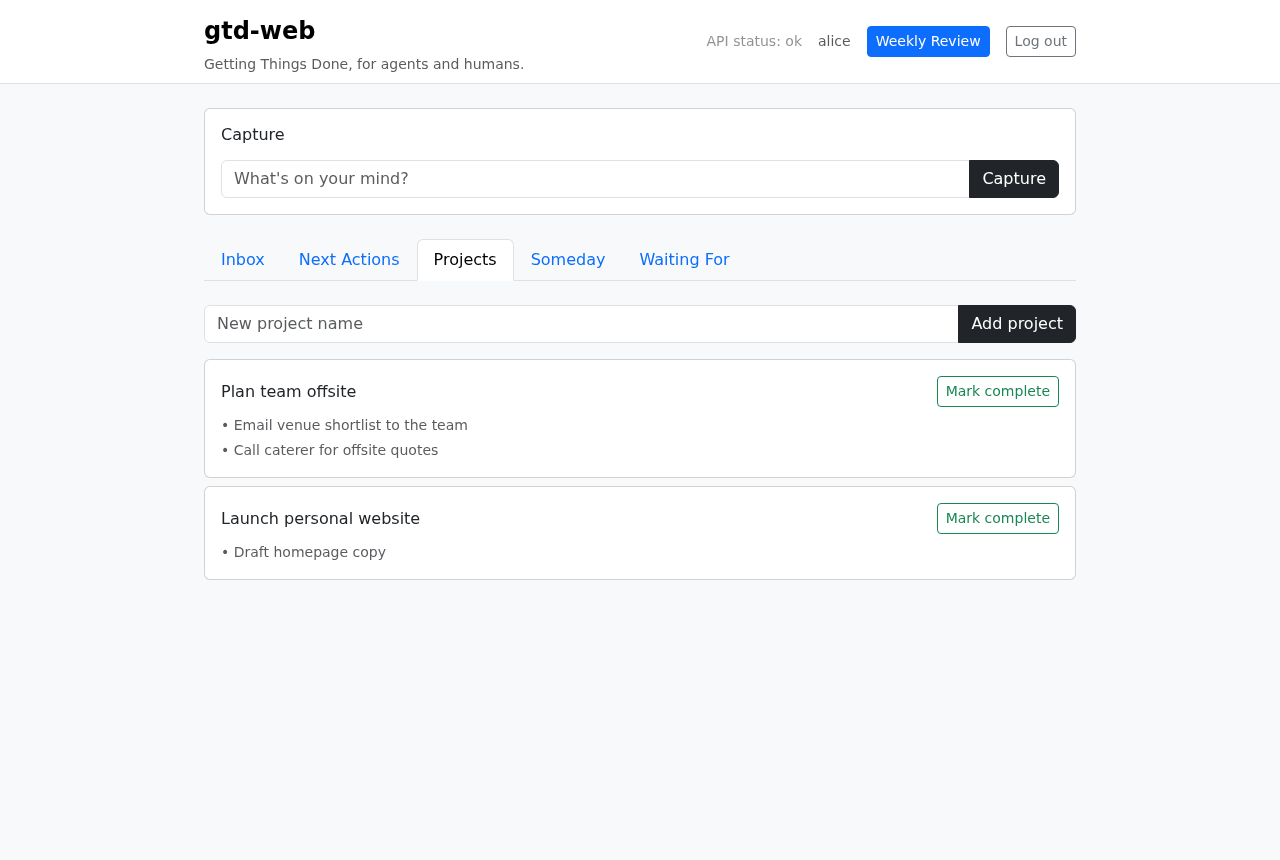
Create a project
- Open the Projects tab.
- Type a name in "New project name".
- Click Add project.
You can also create a project directly from the Inbox by clarifying an item as Project (see section 5).
Work a project
- Each project card lists its items; completed ones are marked (done).
- A project with the note "No next actions yet." is stalled — it has no concrete next step. The Weekly Review flags these for you (section 11).
- To add an action to a project, use the "New next action for this project" field right on the project card — type a title, optionally pick a context, and click Add next action. (You can also capture it from the Inbox and clarify it as Next action into the project, as before.)
Rename or delete a project
- To rename, edit the name field on the project card and click Rename.
- To delete, click Delete on the project card and confirm. Any open next actions or waiting-for items on the project are not deleted with it — they're unassigned from the project and stay on their own lists.
Finish a project
Click Mark complete on the project card when the outcome is achieved. If the project still has open next actions or waiting-for items, gtd-web won't complete it silently — it asks you to confirm first, since those items will be detached from the project (not deleted) so they stay visible on their own lists instead of getting lost behind a closed project.
8. Someday: ideas parked for later
The Someday tab holds things you've decided not to act on now, but don't want to lose.
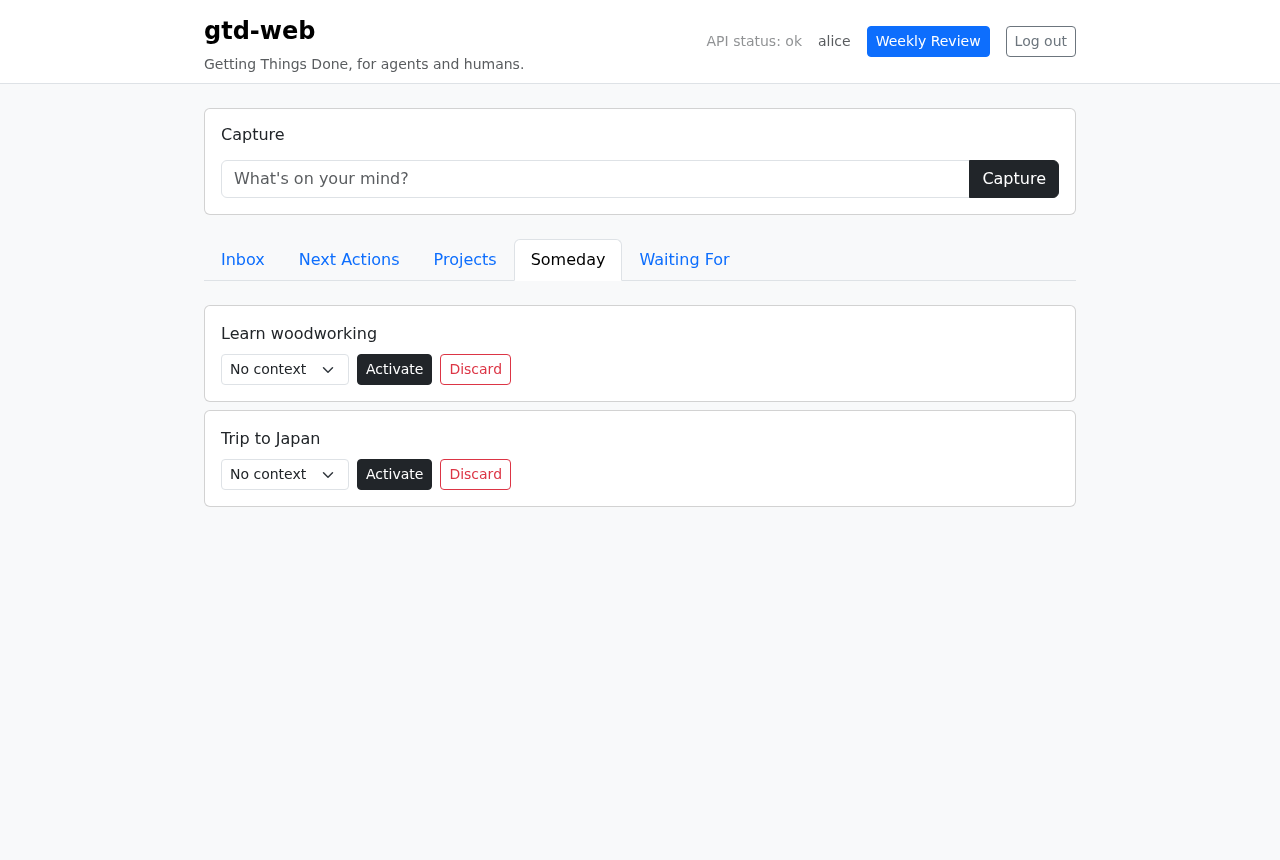
For each someday item you can:
- Activate — turn it into a next action (optionally picking a context first). It moves to your Next Actions list.
- Discard — delete it for good.
You'll be prompted to reconsider this list during every Weekly Review.
9. Waiting For: things in someone else's court
The Waiting For tab tracks everything you've delegated or are blocked on, with a note of who owes you.
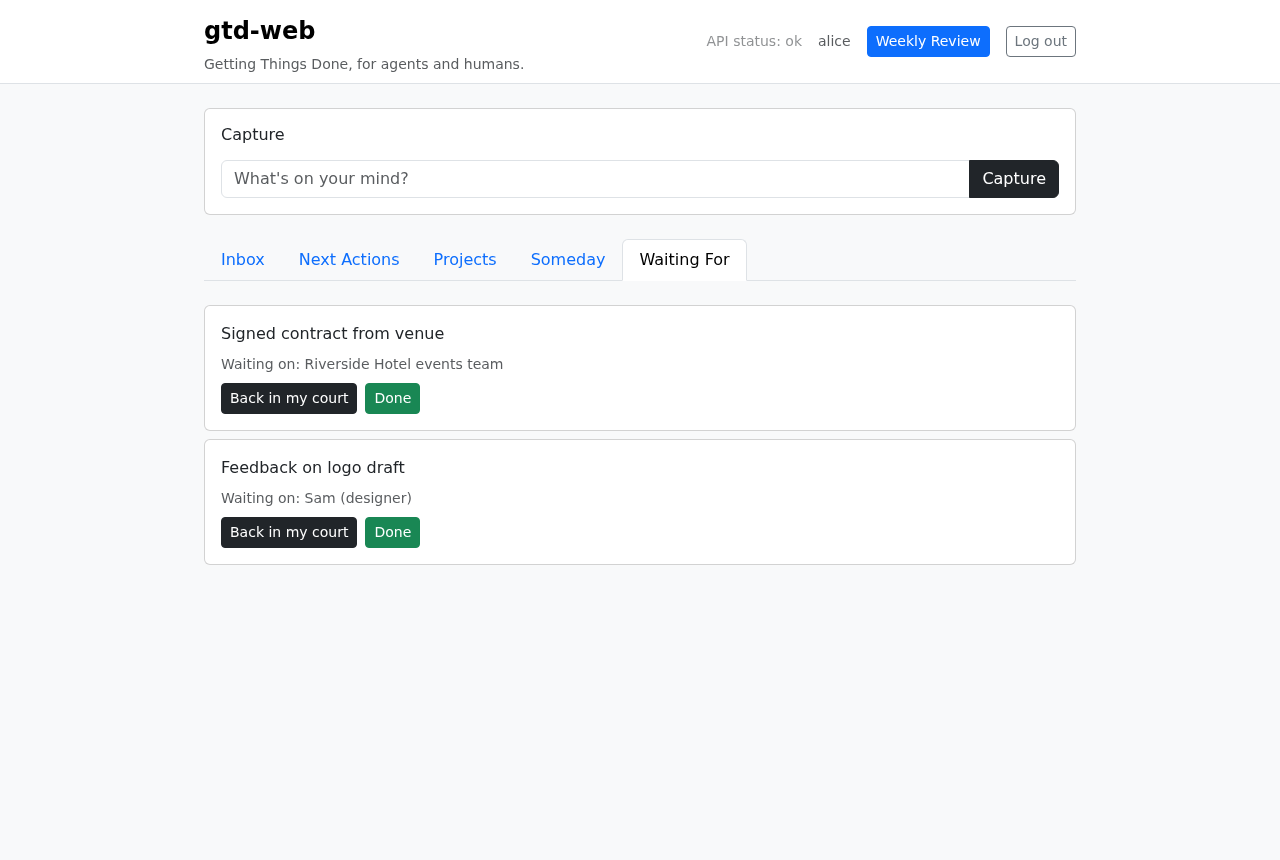
For each waiting item:
- Back in my court — the ball came back to you; the item becomes a next action again.
- Done — whatever you were waiting for happened and nothing is left to do; the item is completed (shows an undo toast, same as completing a next action — see below).
10. Completed: your done list
Every item marked done — from Next Actions or Waiting For — lands in the Completed tab, newest first, with its completion time:
- Un-complete — made a mistake, or the work actually isn't finished? Click Un-complete to send the item back to Next Actions. This is the same action behind the undo toast, just available any time instead of only in the few seconds after completing.
Nothing here is ever silently lost: completing an item never deletes it, it just changes its status, so the Completed tab is always the full record.
11. Weekly Review: keep the system trustworthy
The Weekly Review is GTD's maintenance habit: once a week, walk through your whole system so it stays current and you can trust it. gtd-web guides you through it in four steps.
Click the blue Weekly Review button in the header to start. The review opens in a dialog on top of the app — you can leave at any point with the ✕ button in its header and pick up again later. Every step but the first has a Back button, so you can revisit an earlier step without restarting the review, and none of the steps hard-block you: each one's Continue/Skip remaining & continue button is always clickable, even with unfinished items, so you're never pressured into a hasty decision just to get past the review.
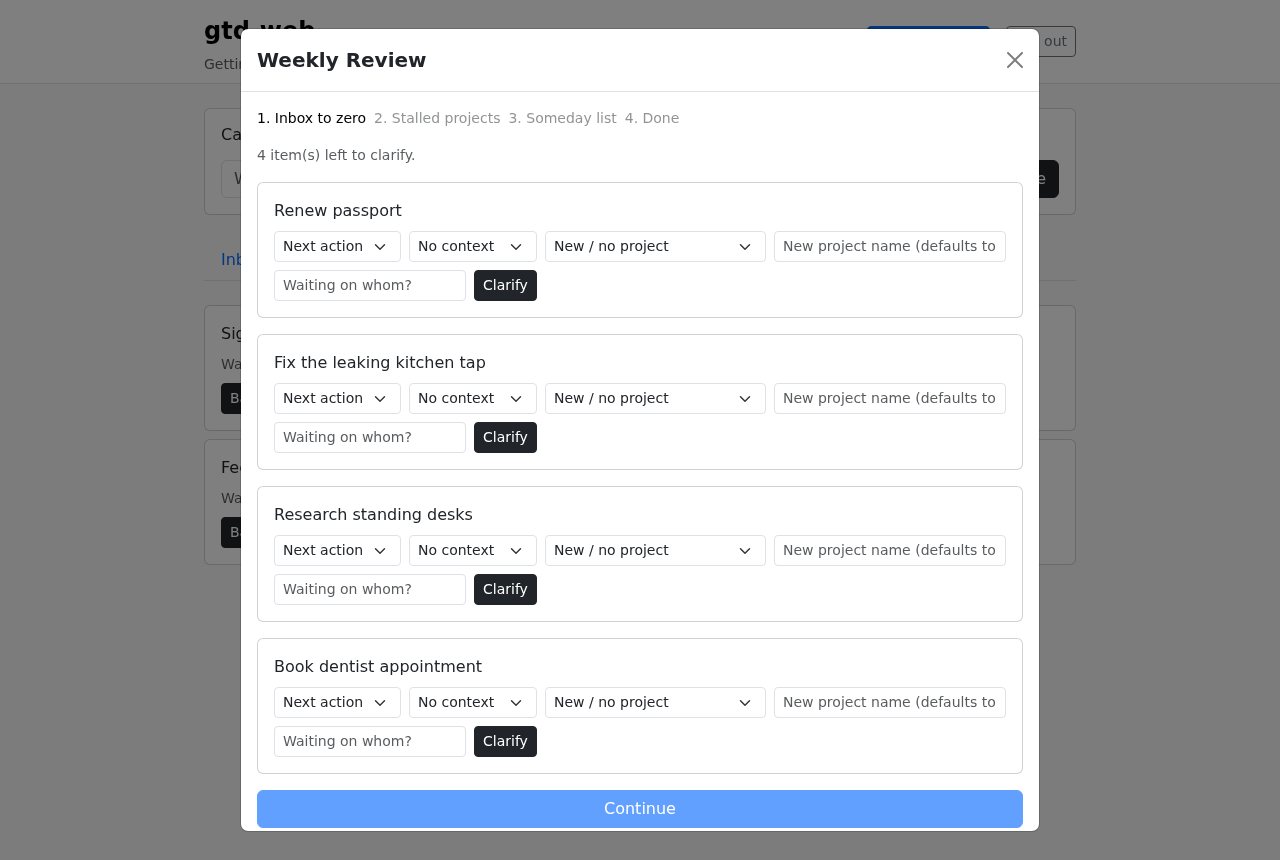
Step 1 — Inbox to zero
The wizard shows any unclarified inbox items with the full clarify controls right in the dialog. Clarify what you can, then click Continue — if items are still left in the inbox, the button reads Skip remaining & continue, so you can move on and finish clarifying the rest later.
When the inbox is empty you'll see "Inbox zero. Nice work.":
Step 2 — Stalled projects
The wizard lists every active project that has no next action, and asks you to add one for each:
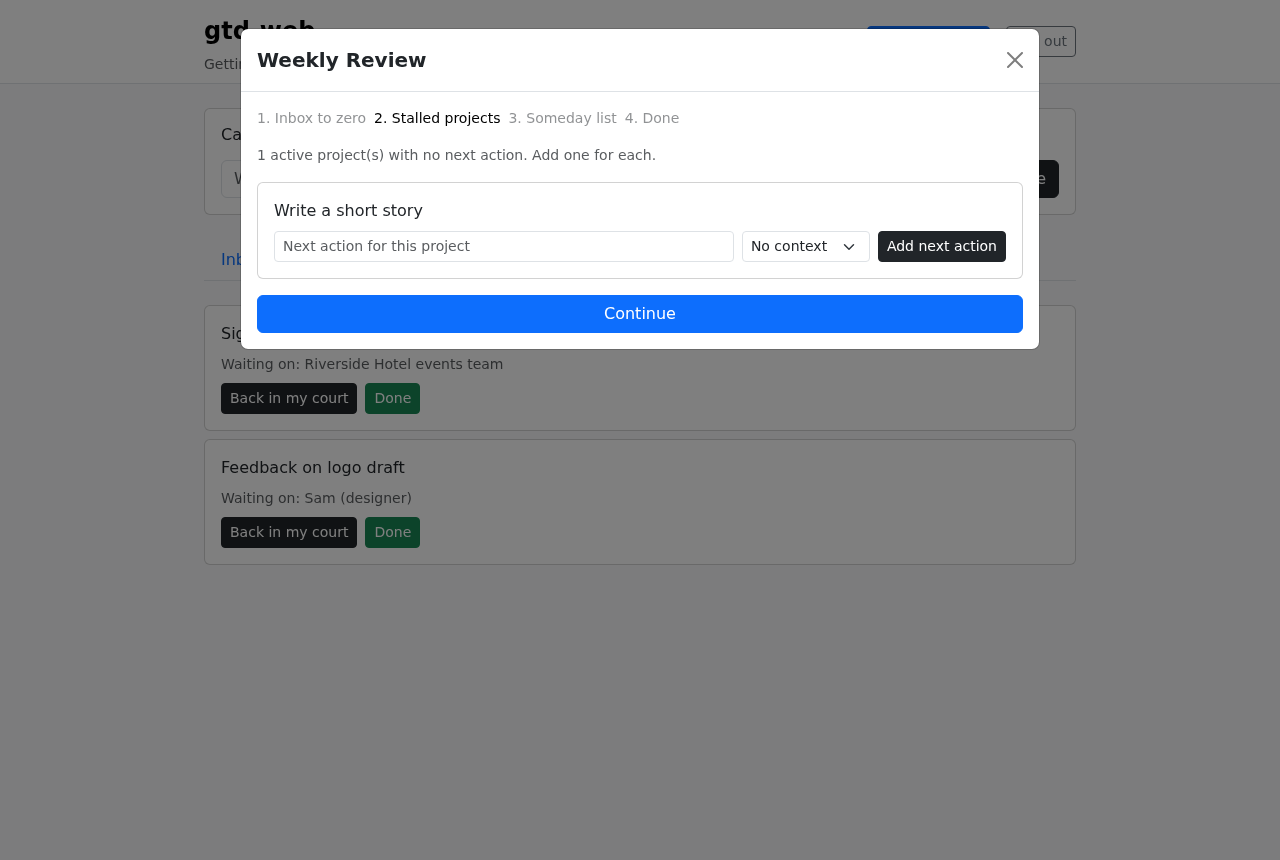
- Type the next concrete step in "Next action for this project".
- (Optional) Pick a context.
- Click Add next action.
- Click Continue (or Skip remaining & continue if projects are still stalled) to move on, or Back to revisit the inbox.
Step 3 — Someday list
Reconsider each parked item: Activate what you're now ready to do, Discard what no longer matters, and leave the rest for next week.
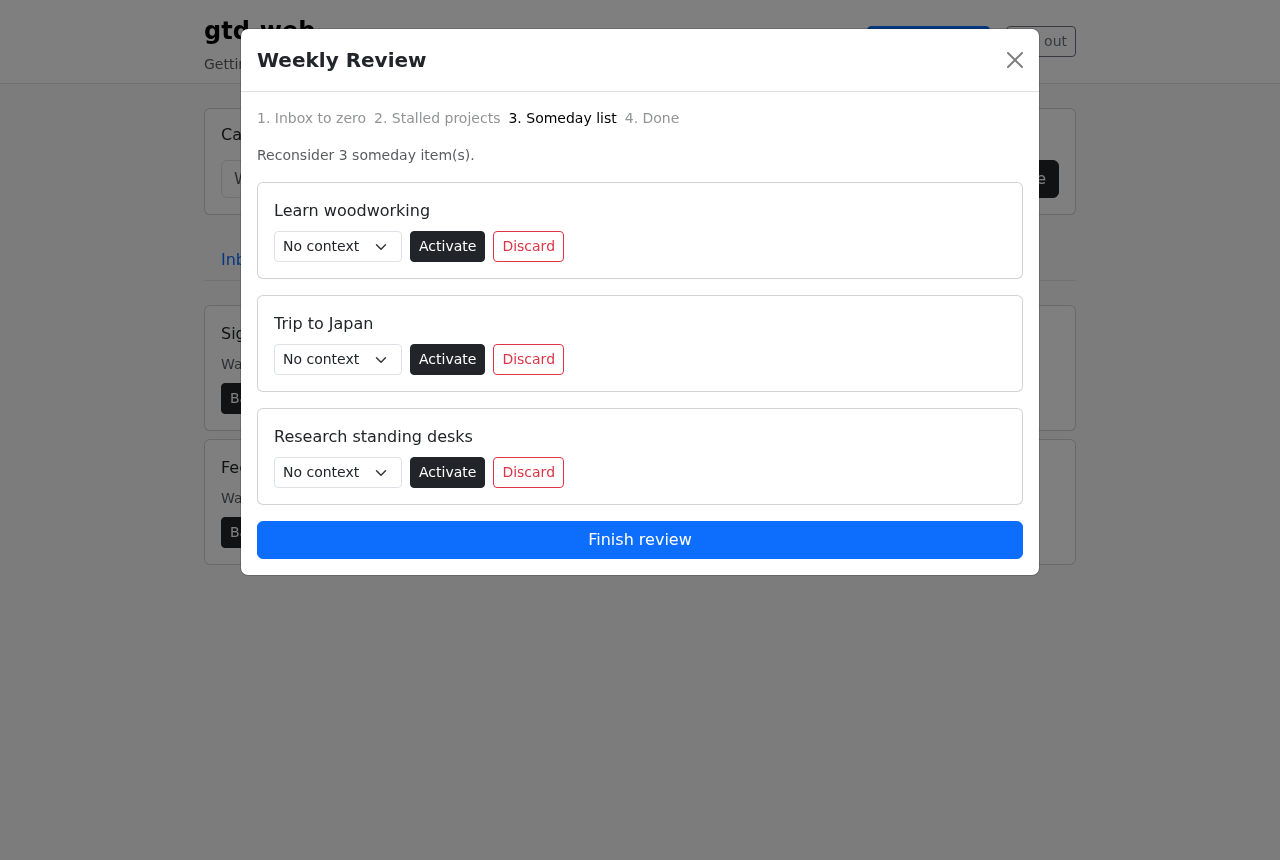
Click Finish review when you're done, or Back to recheck stalled projects.
Step 4 — Done
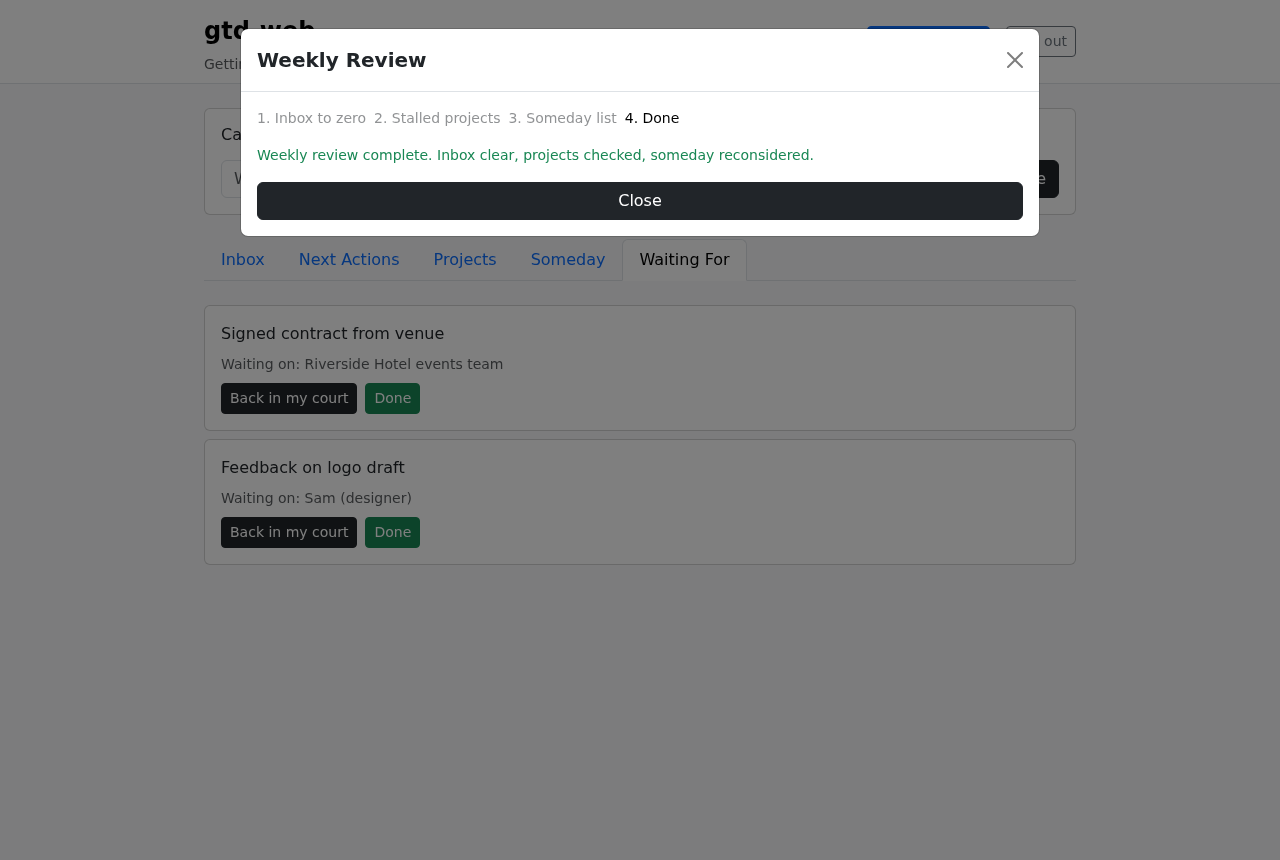
That's the pass done. Anything you skipped along the way — unclarified inbox items, stalled projects, someday items — is still sitting in its list, ready for next time. Click Close (or the ✕ in the dialog header) to return to the app, or Back to keep working through what's left.
12. Contexts
Contexts (@computer, @phone, @errands, …) describe where or with what tool an action can be done, and power the Next Actions filter.
A Manage contexts panel sits at the bottom of the Next Actions tab:
- Add — type a name (e.g.
@calls) in the box and click Add context. - Rename — edit the name in a context's row and click Rename.
- Delete — click Delete on a context's row. Items tagged with it are untagged, not removed.
Trying to create or rename to a name you already have shows an inline error (context names must be unique per account).
Once created, contexts appear in every context dropdown (clarify cards, Next Actions filter, Weekly Review). The same actions are available over the API — handy for agent integrations that set up contexts without a browser:
curl -X POST https://YOUR-SERVER/api/contexts \
  -H "Authorization: Bearer YOUR_API_KEY" \
  -H "Content-Type: application/json" \
  -d '{"name": "@computer"}'
13. Account: email and API tokens for agents
Open the Account tab (last tab in the nav bar) to manage your email address for account recovery and to onboard an agent without ever handing out your password or personal API key.
The Email card shows the address on your account and whether it's Verified or Unverified. If it's unverified, a Resend verification button sends a fresh link; open it to confirm the address. A verified address is required before a forgotten password can be reset (see Reset a forgotten password).
API tokens
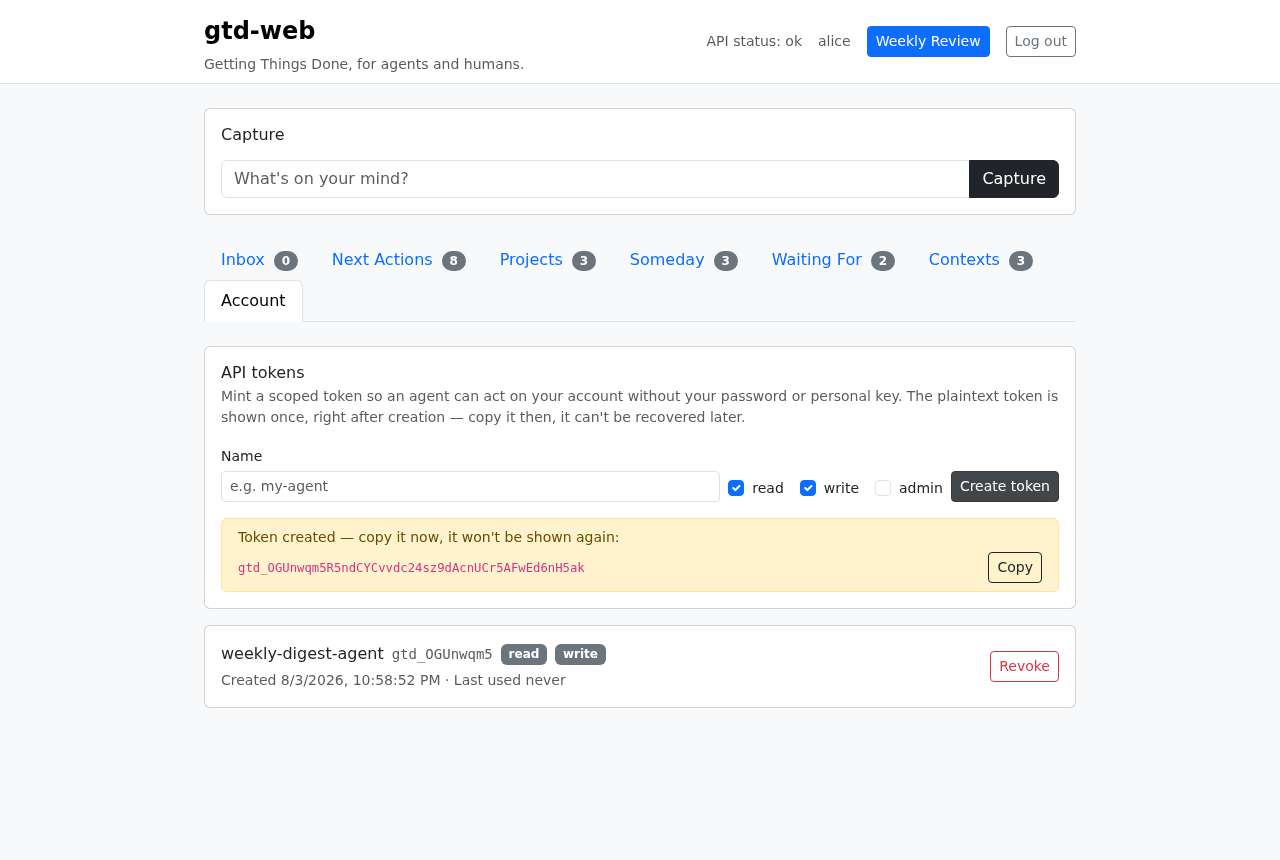
- Create a token — enter a name (e.g.
my-agent), tick the scopes it needs (read,write, and/oradmin— see section 14 for what each scope allows), and click Create token.adminadditionally lets the token mint and revoke your other tokens (still scoped to your own account) — only grant it to an agent that genuinely needs to manage its own credentials, since a compromised admin-scoped agent could mint itself a replacement token after you revoke the original. Token creation is rate-limited per account to blunt a runaway or compromised agent looping the endpoint. - Copy it now — the plaintext token appears once in a yellow banner with a Copy button. It is never shown again (only a hash is stored), and switching tabs or reloading the page clears it from view — if you lose it, revoke it and mint a new one.
- List — every token you've minted is listed below with its name, a short prefix (enough to recognize it later, not enough to reconstruct it), scopes, creation time, and last-used time.
- Revoke — click Revoke on a token's row to disable it immediately; any agent still using it gets a 401 on its next request. Revoked tokens stay in the list (marked
Revoked) as an audit trail rather than disappearing.
The same actions are available over the API (POST/GET /api/tokens, DELETE /api/tokens/{id}) for scripting — see section 14.
14. For agents and scripts: the REST API
gtd-web is built agent-first: everything the UI does is available over a JSON REST API.
Authentication
Two options, both sent as a Bearer token:
- Personal API key — returned when you register (and shown by
GET /api/auth/me). Full access to your account. Rotate it withPOST /api/auth/api-key/rotate. - Scoped API tokens — mint tokens limited to
read,write, and/oradminscopes, either from the Account tab in the UI (see section 13) or withPOST /api/tokens, e.g. for a read-only dashboard agent.
curl https://YOUR-SERVER/api/next-actions \
  -H "Authorization: Bearer YOUR_API_KEY"
Core endpoints
| Action | Endpoint |
|---|---|
| Capture an item | POST /api/items {"title": "..."} |
| List / get / edit / delete an item | GET /api/items?status=&project_id=&context_id= · GET/PATCH/DELETE /api/items/{id} |
| List inbox | GET /api/inbox |
| Clarify an item | POST /api/items/{id}/clarify {"decision": "next_action" \| "project" \| "waiting_for" \| "someday" \| "trash", ...} |
| List next actions | GET /api/next-actions?context_id={id} |
| Complete an item | POST /api/items/{id}/complete |
| Activate / un-complete (someday, waiting-for, or done → next action) | POST /api/items/{id}/activate |
| List waiting-for / someday / done | GET /api/waiting-for · GET /api/someday · GET /api/done |
| Projects | GET/POST /api/projects, GET/PATCH (rename via name)/DELETE /api/projects/{id}, GET /api/projects/{id}/items, POST /api/projects/{id}/complete?force= (409 with open items unless force=true) |
| Stalled projects | GET /api/projects/stalled |
| Contexts | GET/POST /api/contexts, PATCH/DELETE /api/contexts/{id} |
| Item counts per list (tab badges) | GET /api/counts |
| Manage your own API tokens | GET/POST /api/tokens, DELETE /api/tokens/{id} |
| Register / log in / log out | POST /api/auth/register · POST /api/auth/login · POST /api/auth/logout |
| Account recovery (no auth) | POST /api/auth/forgot-password · POST /api/auth/reset-password · POST /api/auth/verify-email |
| Health check (no auth) | GET /api/health |
All data is per-account: an API key or token only ever sees the items of the user who created it.
Full schemas for every request/response body (including which fields are optional) are
generated from the FastAPI routes themselves at /openapi.json, with interactive
"try it out" docs at /docs. This table is a map, not the source of truth — if it
and /openapi.json ever disagree, trust /openapi.json.
15. Troubleshooting
"Too many attempts" / HTTP 429 when logging in or registering. Login and registration are rate-limited per IP and per username to block password guessing. Wait a minute or two and retry.
HTTP 429 when creating an API token.
Token creation (POST /api/tokens) is rate-limited per account (and per IP) to blunt a runaway or compromised agent that loops minting tokens. Wait a few minutes and retry.
My password-reset or verification link doesn't work. Reset links expire after 30 minutes and verification links after 24 hours, and each can be used only once. Request a fresh one (click Forgot password? again, or Resend verification on the Account tab). If the link says the address is unverified, verify it first.
A request from a script fails with a CSRF error.
CSRF protection applies to browser session cookies. Scripts and agents should authenticate with Authorization: Bearer <api_key or token> instead of cookies — Bearer requests are exempt from CSRF checks.
I can't see an item I know exists. Data is strictly per-user. Make sure you're logged in as (or using the API key of) the account that owns the item.
The header says the API status is not ok.
The frontend pings GET /api/health on load. If it fails, the backend is down or unreachable — contact your administrator.
A red banner appears at the top of the screen. A load or action failed — the banner text has the reason (e.g. a duplicate name, or a server/network error). Fix the underlying issue (or retry once connectivity is back) and dismiss the banner with its × button; it doesn't block the rest of the app.